Guides
What sits inside a UHF RFID label?
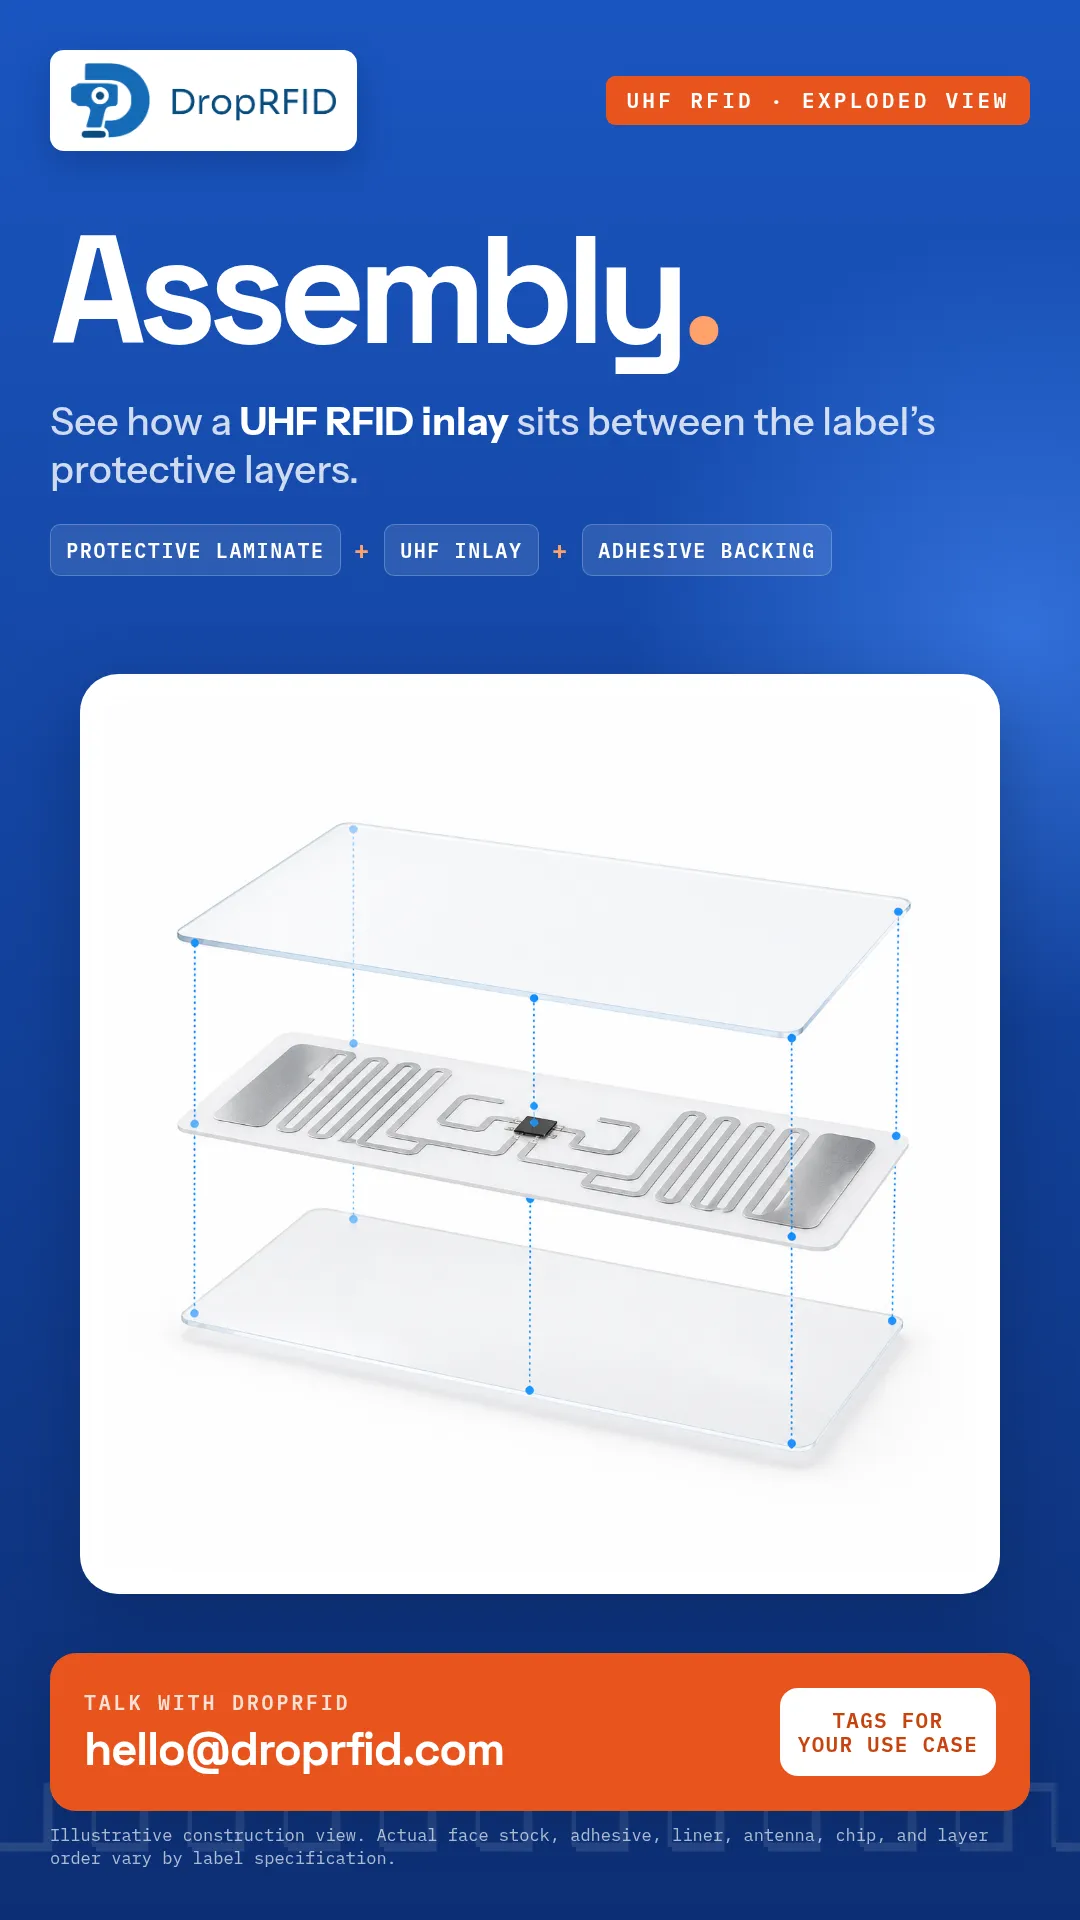
A simplified exploded view explains the protective layers, UHF inlay, and adhesive backing that can make up an RFID label.
A UHF RFID label may look like an ordinary adhesive label from the outside. Inside, it combines an RFID inlay with materials selected for the product, surface, environment, and application.
The simplified stack
The campaign’s exploded view shows three broad layers:
- Protective laminate: a face or cover material that protects the printed surface and inlay.
- UHF RFID inlay: an antenna paired with a small chip that stores and communicates the tag identity.
- Adhesive backing: the adhesive and release-liner side used to apply the label to its target surface.
This is an explanatory model, not an engineering drawing or a photograph of one production label. Actual face stock, adhesive, release liner, antenna, chip, layer order, and construction vary by specification.
The application changes the design
A label that works well on corrugated packaging may need a different construction on metal, plastic, glass, liquid-filled goods, curved surfaces, or objects exposed to moisture and abrasion. Placement and orientation matter as much as the inlay itself. Reader power, antenna position, tag spacing, environment, and interference also affect observed performance.
For that reason, avoid treating a generic “range” or “reads per second” number as a promise for every label. UHF RFID performance should be validated with representative products and the intended reader configuration. The relevant test is the one that resembles the real workflow.
From identity to workflow
The inlay gives the object a machine-readable identity. A system can map that tag ID to a SKU, order line, asset record, or other configured record. DropRFID supports SKU and RFID-to-SKU mapping, scan sessions, and expected-versus-observed review. The best mapping depends on what the operation needs to identify and how exceptions will be handled.
The label itself is not proof of authenticity, legal ownership, or chain of custody. Those claims require controls beyond a tag. Likewise, a concept image does not establish a specific supplier, chip, adhesive, or production process.
If you are selecting labels, describe the item, surface, environment, read workflow, and required durability. Then test samples in place. A conversation with DropRFID at hello@droprfid.com can help scope the tag and label requirements without pretending that one construction fits every use case.
It is also worth planning the label’s end of life. Decide whether labels are removed, recycled, overwritten, or retained with the item record. That operational detail affects adhesive choice, data retention, and the work required when products move through receiving, storage, fulfillment, and returns.
Those choices are part of label design, not an afterthought once printing begins.
They should be captured in the project specification alongside read testing.
The specification should name the intended surface and environment, so later changes do not quietly invalidate the original test.
That context is essential when comparing suppliers or revising an application.